2015: looking ahead

If 2014 was the year of necessary repairs 2015 will hopefully be the year of the remodel or the year WE get to start realizing the vision WE had for this house when WE first walk through it with our real estate agent.

WE have a lot of projects planned and hopefully WE’ll be able to get to all of them.

Here is what WE are aiming for: First more content here. WE’ve gotten pretty good at using Instagram to post picture of things WE’re making as they happen, but still struggle to get that content onto the blog. WE’re not making promises but our goal is for there to be at least twice as many posts this year.

Second, this year WE’re going to make more stuff that we did last year, probably (hopefully) a lot more. Last year was a lot or repairing and fixing things this year will be much heavier in the actual making things department. Our only real making project for 2014 was a vanity for the master bathroom and it really made W realize how exciting actually creating things can be.

We tend to put twice as much on a To Do list than can be accomplished in a day but it’s god to have loft goals so here is what WE are aiming for in 2015 (not in order of priority).

  • WE need to install and trim out a dozen new windows.
  • A more functional and better looking master closet
  • A laundry room (which there currently is not).
  • Built in bunk beds for the guest bedroom.
  • Built in bookshelves and storage for the empty den.
  • Some furniture pieces.
  • And maybe even start working on a completely new kitchen.

Stay tuned to see what WE’re making and be sure to follow us on Instagram @WEmadestuff for much more up to date photos of what WE’re making.

2014: Looking back on our first year of home ownership

Happy Belated New Year!

Today marks one year of owning our home and WE’ve come a long way.

So We’d like to do a post looking back on what was done this year, many things yet to be blogged, and another for what WE have in the works for the coming year.

WE’ve learned that owning a home is sort of like owning a car, it requires regular maintenance and some parts don’t last as long as others. Also if you put off or just avoid some of the regular maintenance it can create some bigger issues to deal with down the road.
2014 has been a year of doing regular maintenance, making up for neglected maintenance, doing some necessary upgrade for a 40 year old home, and repairing some issues. A good many of the things WE dealt with this past year had not really been in the plans and some stuff WE knew about and had planned on addressing later on but decided to get out of the way now.

Our year in review:
From closing on the house on January 2nd to around the end of February was spent cleaning the place up and getting ready to move it. What was probably a decade of being a rental property had not been kind to our home. WE removed tons (possibly literally) of junk that had been left at the house, cleaned everything (probably twice), put in a new front door, put in a new back door (French doors, that unlike the door that was removed could be locked), painted a few rooms, and got the necessary appliances that didn’t come with the house.

In February we moved into the house and started inhabiting the guest bedroom as it was one of the rooms that needed little work and had already been painted. Shortly after we found ourselves going down the rabbit hole that was documented on the blog. WE did a lot of yard work, which consequently is probably the cheapest thing you can do to really up the curb appeal of a home. A few dollars spent on a rake and some clippers went a long way. Biggest bang for the buck project WE’ve done and it’s not even a close race.
In the midst of that we gutted the hall bathroom and began working on solving all the problems in there, this was a total remodel leaving only the tub/shower in place, though it did receive a lot of TLC and elbow grease.

After those projects wrapped up WE fixed a moldy drywall issue in the master bedroom. Our best guess is that someone’s waterbed sprung a leak at some point and things were never really taken care of properly. Once that was done we were able to get the room painted and move into our bedroom. Then WE started on fixing another drywall issue in the 3rd bedroom. After getting all of the wall paper removed in that room it was discovered that due to some poor insulation and the proximity of the crawlspace entrance/a heater vent and the window a moisture problem had formed and lead to another mold issue.
More drywall replaced and the room was painted and ready to be used as a functional bedroom.

It was then time to start working on the master bathroom. Which like the other bathroom was a total gut job with some posts to come.

In the midst of these projects a few smaller ones took place in the yard like trimming back and removing some trees from the yard. WE pulled out over of 50 feet of vine infested chain link fence, and rescued our neighbors fence in the process, making the back yard look much tamer. Once that was under control WE planted four peach trees as well to gain some visual privacy from the folks who live behind us. A rusty old shed in the back corner of the yard was removed to cap off cleaning up the yard.

WE also had a contractor come in and help us fix up some bigger electrical issues and W learned to do some electrical work too (post to come). With the laundry room being a much safer and cleaner looking space after the electrical job a plumber was called in to move all the pipes that had been run outside the walls back into the walls and run the plumbing for a laundry room sink.

WE also ordered and started installing all new windows for the house to replace the old single pane windows that were painted shut, hard to use, had ugly storm windows and the biggest reason, were covered in lead paint. The den was also gutted in November with the wood paneling coming down and the floor coming out. Due to some improperly draining gutters and poorly sealed brick veneer WE brought in a contractor to replace the sole plate of the den, which was having some rotting issues.

Oh and while all that stuff was going on WE both managed to hold down steady jobs, get promoted, make some really great friends, entertain visitors, and explore our new city. In the final two weeks of the year we also adopted an adorable puppy from the local shelter, odds are good that he will not be a factor in increasing our productivity in the New Year.

Hall Bathroom Pt. 4 After

So here is what WE ended up with. If WE missed a photo or there was something you were hoping to see leave a comment and let us know and WE’ll be sure to add it for you.

That annoying closet is gone and now the doors don't bang into each other.
That annoying closet is gone and now the doors don’t bang into each other.
The bottom of the closet was closed in and the useful parts of the closet moved to the hallway. (It still needs a door but it is already quite useful.)

The bottom of the closet was closed in and the useful parts of the closet moved to the hallway. (It still needs a door but it is already quite useful.)

The other closet now has shelves and can be used like a bathroom closet. It also still needs a door, WE're looking to put in a bi-fold door so that it's less in the way and won't be taken out by the entry door.

The other closet now has shelves and can be used like a bathroom closet. It also still needs a door, WE’re looking to put in a bi-fold door so that it’s less in the way and won’t be taken out by the entry door. Update: there is a bi fold door there now, it just needs to be painted.

The tub is all cleaned up and sealed up. E took on her first sewing project and made some awesome curtains and W's mom helped out by turning a duvet cover into a shower curtain.

The tub is all cleaned up and sealed up. E took on her first sewing project and made some awesome curtains and W’s mom helped out by turning a duvet cover into a shower curtain.

A new light, a new mirror, a new leak free sink and a leak free comfort height toilet to match, sitting on that new floor with some fancy looking wainscotting on the walls. Oh and isn't that bright color on the walls fun?

A new light, a new mirror, a new leak free sink and a leak free comfort height toilet to match, sitting on that new floor with some fancy looking wainscotting on the walls. Oh and isn’t that bright color on the walls fun?

Hall Bathroom Pt. 3 During

Before WE give you the after photos WE’ll first share some during photos. So here are a few shots of things coming together and in some cases coming apart.

tearing things out

tearing things out

creating some openings to for closet solutions.

creating some openings to for closet solutions.

framing it all in for drywall

framing it all in for drywall

putting some flooring down

putting some flooring down

making the walls just a bit prettier, adding that extra dose of classy.

making the walls just a bit prettier, adding that extra dose of classy.

Little pro tip WE picked up while doing the wainscott detail. You're floor is probably not level but thats not were the eye will be looking so make your level line for the beadboard a few inches off the floor and get that stuff in straight. Then fill in the hole on the bottom with thin strips of plywood to make sure the baseboard sits level and nails easier. No one will ever know.

Little pro tip WE picked up while doing the wainscott detail. You’re floor is probably not level but thats not were the eye will be looking so make your level line for the beadboard and chair rail a little higher so the beadboard goes on a few inches off the floor and get that stuff in straight. Then fill in the hole on the bottom with thin strips of plywood to make sure the baseboard sits level and nails easier. No one will ever know.

Hall Bathroom Pt. 2 The before pictures

The best part of just about every tv show on HGTV and the DIY network occurs in the last 5 minutes, when you get to see where things started and how they ended up. Everything in between is some what enjoyable to watch but the real excitement is in seeing the results. The same is true when doing the actual projects the best part is stepping back at the end, seeing the changes that were made and being able to say “Wow, WE did that!”

In the last post you got to see the bathroom gutted and WE gave you a list of the problems we wanted to solve, but now that WE have some actual after photos to show you WE feel comfortable showing you the before.


Thats the closet that gets in the way and is not entirely useful.

Thats the closet that gets in the way and is not entirely useful.

This is the other closet in the bathroom, which was set up more like a coat closet than a bathroom closet.

This is the other closet in the bathroom, which was set up more like a coat closet than a bathroom closet.

See that floor, and those ugly shutter on the window, yuck.

See that floor, and those ugly shutter on the window, yuck.

That toilet was designed for people under 5 feet to use comfortably, and it leaked, the medicine cabinet was just a "little" rusty on the inside, the vanity wobbled and the sink leaked.

That toilet was designed for people under 5 feet to use comfortably, and it leaked, the medicine cabinet was just a “little” rusty on the inside, the vanity wobbled and the sink leaked.

Hall Bathroom Pt. 1 Rehabbing a shower and gutting

WE originally figured WE would have to replace the whole shower in the bathroom because it had been installed poorly (meaning wrong) and all the seams were full or mildew and mold. The shower had also not really been cleaned well for a good while so it just looked gross. Once WE figured out that borax can clean just about anything the shower started to seem salvageable. A few hours and a tooth brush cleaned up all of the seams, and the proper application of some silicone caulk left the shower looking just about brand new. Saving the shower for around $5 meant WE actually had a budget to remodel the rest of the bathroom which really needed it. This is the bathroom that our guest and any visitor to the house would be using which means WE want it to be a nice and comfortable place. So while the plumbers were working under the house and the contractors were keeping W out of the shop he started to go after the bathroom.


The bathroom had a few problems that needed addressing: a terrible lay out due to an over crowding of doors, a short and uncomfortable toilet (which turned out to be leaking), a rusting medicine cabinet, a small wobbly vanity, a damaged and bubbling linoleum floor, and a water damaged subfloor. It didn’t take to long to realize that our best bet was to gut the bathroom and start with a blank canvas.

Here is a drawing to better explain the door problem.

The Purple door is the entrance to the bathroom off the hallway, the Orange and Green doors are to closets.

The Purple door is the entrance to the bathroom off the hallway, the Orange and Green doors are to closets.

Everything out but the tub/shower

Everything out but the tub/shower

Still working

WE’ve got a few projects going on and have been relaxing in our down time instead of writing things up. 

So many blogs make this seem so easy you just work on stuff and then quickly out together a series of great photos and well written narrative about an hour later. 

But all those pictures mean washing your hands a 100 times while you are in the middle of a project, or trying to balance something over your head while holding the camera and in those situations its quite easy to forget that “this would be a good thing to get a photo of.” Writing things up can be time spent working on other things and when the list is long that time can come at a premium. So don’t worry, WE’re working, and getting some photos taken, but lately WE’ve not been writing. 

However, this is summer in the south so soon there will be rainy days, times when its too hot to move, or WE might run out of energy, and then things will get written. 

In the mean time, hang with us, WE’re still here, WE’re just busy making stuff. 

And to get content in between posts don’t forget WE’re on instagram @WEmadestuff, and on Twitter @WEtryDIY. 

Pt. 7 Anchoring and Replacing Our Sole

Sometimes you get bad with your good as was the case with our last post.  Sometimes you get good with your bad, as was the case with this problem. The termite damage was something a home inspection couldn’t and wouldn’t find, the only way to find it was to completely tear out the floor and if WE were not overly ambitious and eager to use the space WE never would have found it. Once the contractors came in and started to really dig into things they found even bigger problems. The sole plate of the garage was not installed properly; it was barely sitting on the foundation and was more or less not attached to it either. The next big project planned for the shop is to raise and properly support the second floor joists (much more to come on that later) and as the contractors informed us it was likely that while raising the joists the front corners of the shop near the doorways would have slipped off the foundation and possibly brought the place down on our heads. So WE got really some good with our bad on this one.

That part is a little more exciting than the actual work was . Due to the lack of anchoring on the sole plate the whole future shop only needed to be raised about ½ of an inch to remove the two 2×4’s that made up the existing sole plate. The sole plate was replaced with stacked (like this = where as previously the 2×4’s were sitting like this ||) pressure treated 2×6’s with treated ½ inch plywood sandwiched between them, then properly anchored to the foundation with Tapcon concrete screws. The walls were lowered back onto the sole plate and attached with lots of framing nails. It all sounds pretty simple but it took them two long days to get it together. After that the floor was leveled, a trench dug around the bottom and some rebar anchors drilled into the foundation. About two weeks later after things had dried up the contactors came back and poured a cement slab for the future shop floor. The rebar anchors into the slab help tie the whole thing together making the future shop nice and solid.

This future shop was a rather uninvolved fix for us. Though we did have some of the nicest and chattiest general contractors on the planet who were willing to offer hours of free advice if you could just get them going, which was as easy as asking how’s it going? At the advice of the contractors WE also had an additional problem solved while they were here as well. A small lake forms at the end of our driveway every time it rains due to the driveway following the couture of a nonexistent ditch. Since one of the pricey parts of pouring concrete is bringing in the truck they suggested we level the driveway to remove our lake while the truck was here to pour the future shop floor. It makes the driveway and front yard look a lot nicer and has proven to be a great idea during a few recent weather events.

Doesn’t look like much but thats the new sole plate down there.

That's all the farther the truck got before it started cracking the driveway so they had to wheel barrow everything back.

That’s all the farther the truck got before it started cracking the driveway so they had to wheel barrow everything back.

A new sturdy floor

A new sturdy floor

So WE survived our unexpected journey and have moved on to some other projects so stay tuned.

Pt. 6 Fixing Plumbing and An Extra Tunnel

 Sometimes you get some bad with your good.

A plumber and his helper spent about three days visiting us and got a bunch of things going. While working under the house to properly connect the washing machine drain and the kitchen sink to the rest of the plumbing, they were also able to relocate the natural gas feed so WE could replace the old range and wall oven with a new free standing one. This allowed us to do a quick mini kitchen remodel while they were working on other things.

The old range

The old range

Making room

Making room

The mini remodel complete.

The mini remodel complete.

While removing the bathroom floor in the guest bathroom W had noticed some water damage around the toilet so he stopped the water to that toilet and conveniently waited until some plumbers were hanging around the house to pull the toilet and make sure a trained eye could take a look at the connections. However, it didn’t take a trained eye to spot the problem, but with a plumber already under the house a new line to the toilet was run to replaced a rusted out cast iron flange and elbow. So while the plumber cut and fixed the pipes W removed the vanity and the wet sub floor.

some water damge

some water damage

A displaced toilet

A displaced toilet

Pt. 5 Making Our Way Out

 There is a minor additional tunnel to come but all things in order. It took about two weeks to get a few opinions on how to fix the future shop and what to do about the plumbing. WE also needed some time to process the bids, see what all was worth doing and figure out what parts of the jobs WE could handle on our own. Once we picked our contractors and plumber W set about solving the exterior plumbing problems that did not involve cast iron.

The time consuming part of this project, since all the pipes had already been located, was digging everything up. After that it was just a trip to the big box store for parts, cutting out the bad stuff and disconnecting the future shop (and kitchen sink), cutting and assembling the new parts (measure thrice cut twice is how it seems to work here), and reconnecting the house to the sewer line.

The plumbing connections in the future shop were a good deal easier since the only goal was to get everything below where the concrete would be poured. So those were dug up (the presence of gravel made that more fun), cut loose, capped with spray insulation and buried.

Now we were ready for the pros to bail us out.

Everything cut free and smelling terrible.

Everything cut free and smelling terrible.

All fixed up and ready to be buried.

All fixed up and ready to be buried.

A Side Note:

Plumbers like electricians and car mechanics and those sorts of folks are able to charge a high hourly rater for their work because they have a specialized skill you don’t (and they are faster than you). However, when they give you a bid for a project they charge the “I have special skills rate” for every hour of the job, even the parts that don’t require any of their special skills. So if a plumber has to fix a pipe that is buried in your back yard, even if the job is simple it will cost a lot because you have to pay them lots of “special sills” hours to dig a hole and fill that hole back in. So always try to figure out what you can do with your laymen skills to shrink the hours required to do the job and get someone who is willing to bid things taking that into account.

Pt. 4 Termite Treatment

 The guy who had done the pest inspection when WE bought the house felt pretty terrible about the whole termite issue that he made us a great deal on treating the buggers. This was pretty quick and easy for us. WE called him and the next day while WE were at work the treatment was done.

There are a few different types of termites out there and they all require a different approach for treatment. The termites out here in the Up State are subterranean termites, that don’t really fly, don’t stray to far from the ground and the queens tend to live deep under the ground. That means you don’t have to tent the whole house to treat them, instead they dig a trench around the house and put some chemical down in there. That also means no bagging up your food, no evacuating for a few day, just go to work, come home and it’s done.

This was one of those things that its best to have done anyway and having it done is the easy part. Dealing with the damage from lack of treatment before that’s the messy bit.

Pt. 3 The Third Tunnel

WE stumbled into the third tunnel the very next day.

W had decided that in order to better prepare for some work that was going to be needed in the future shop, the best course of action for the flooring would be to remove the existing 2×4 support web and replace it after adding a moisture barrier and some footers. Removing the 2×4’s was going along smoothly until it was time to remove the 2×4 that attached to the sole plate. (The sole plate is the wood that connects the walls to the foundation.) The first 2×4 just sort of fell off the sole plate while setting the pry bar and brought with it a bunch of the sole plate and a whole bunch of ants.

It didn’t take long to discern that the entire sole plate had been half eaten by termites and would need to be replaced.

If you were to pause right there and think about that for just a second you would quickly come to the realization that replacing the thing that connects the walls to the foundation can only be done by first lifting the building off the foundation and that is not a DIY project, so we found ourselves again calling a pro.

There was also the issue of pest control, something had to be done about the termites if any remained and WE’d need the peace of mind that they would not be coming back. Major pest control is another issue best left to the professionals.

2x4's out of the way, but not to be quickly replaced.

2×4’s out of the way, but not to be quickly replaced.

You can sort of see the damage to the sole plate if you look closely at the bottom of the walls.

You can sort of see the damage to the sole plate if you look closely at the bottom of the walls.

That used to be the future shop floor.

That used to be the future shop floor.

Pt. 2 The Second Tunnel

So the kitchen sink drains into the future shop, this startling revelation lead to doing dishes in the bathroom for a few days after moving in. At this point WE had no idea what this meant other than it was bad. WE’ll fast forward through a call to the home warranty folks who found no problems to our deciding that the future shop did not need floor drains, toilets or plumbing if it was going to cause these problems. You’re not really allowed to get upset about losing the possibility of plumbing when you were not expecting to have plumbing.  So our plan was to simply disconnect the future shop from the main line in the yard running to the sewer, which would hopefully force the sink to drain to the right place.

Free life lesson here though, before you ever go disconnecting anything form the main line running to the sewer make sure you first know everything that is being disconnected. With that in mind W got a 3’ metal rod and started poking holes throughout the yard to trace the line to the future shop and make sure that was the only place it went. Hours of poking and digging later a few things had been discovered. The first was that the connection point for the houses into the sewer line was cracked and would have to be replaced. The second was that the kitchen sink and washing machine hook ups had been tied into the sewer line connecting the future shop to the main sewer line, removing the future shop from the sewer line would also mean disconnecting the kitchen and laundry from the sewer.

The only apparent solution to the problem was to re-plumb the kitchen and laundry room and tie them into the bathroom plumbing under the house, (which they would have been at some point in time like when the house was built so WE knew that was possible). This would involve redoing some sink plumbing, redoing a washing machine drain and cutting into a fair amount of cast iron pipe. Though it seemed possible that WE could figure it out on our own it also seemed like a bad idea to have this be our first ever plumbing project. It would also probably take us a few weeks and that meant a few weeks of doing dishes in the bathroom sink.

So when all else fails and you cannot DIY you have to call a pro.

The black line in the red circle is a big crack in the joint. The red arrow is the portion leading to the future shop.

The black line in the red circle is a big crack in the joint. The red arrow is the portion leading to the future shop.

The blue line is a poor tracing of the line going to the sewer from the house. The red line is the sewer line going to the future shop and the Yellow line is where the kitchen sink ties into the future shop line.
The blue line is a poor tracing of the line going to the sewer from the house. The red line is the sewer line going to the future shop and the yellow line is where the kitchen sink ties into the future shop line. The yellow line needs to be tied into the blue one under the house and the red line needs to be eliminated.

Down the Rabbit Hole

We’ll WE are almost near the end of, or hopefully about to come out of, this rabbit hole so WE can probably start putting up some posts about it though, this series will stretch on for a while; both to detail everything and give us time to finish and write up other projects.

It is worth stating though before you join us for a twisty journey through this rabbit hole that in-spite of being initially and quite quickly overwhelmed, panicked, a little distraught, upset and other such emotions when WE found ourselves making our way down this path that WE also shortly thereafter found ourselves feeling rather thankful for the timing of things. Though the issues don’t feel like a blessing, finding everything when WE did feels like a huge one.

WE will do some posts for the issues that were discovered, or the tunnels of the rabbit hole WE found our selves in, and then WE’ll follow those up with posts on how WE got out of the rabbit hole or the resolutions to the issues.

Pt. 1 The first tunnel

One of the first big projects WE had planned on tackling was replacing the wooden floor in the detached building, to be known as the future shop for the time being. The floor that was in there was not thick enough, uneven and well worn making it too risky to place large tools, like a table saw in the future shop without the chance of it going through the floor. The quickest and most simple fix was pull up the existing floor and replace it with something thicker and more suited to the task. So within a few days of closing on the property the materials needed for that project were delivered along with our new doors and placed in the dinning room to keep them out of the elements. So about twenty 4’ by 8’ sheets of ¾ inch flooring boards stacked in the corner, or rather one half, of the dinning room to pretty up the place.

Just to give you an idea of what needed to be removed from the upstairs of the future shop.

Just to give you an idea of what needed to be removed from the upstairs of the future shop.

However, before the existing floor could be removed, the building first needed to be emptied of its contents. A few TV’s, some furniture, 8 overflowing car loads of clothes, mounds and mounds of miscellaneous stuff, books, cassette tapes, a few suitcases, some exercise equipment, and a turkey deep fryer were removed over the next two weeks to get the place ready. When WE first started to get things cleared out of the future shop WE discovered that there was a floor drain and a plumbing connection coming to the shop space under the wooden floor. This was entirely unknown to us at the time of purchase as it was all buried under junk and at the time WE were not sure what to think of it.

Once the existing flooring was removed it was clear that there was a moisture problem under the floor, which was the reason it had become wavy looking. Then while W was clearing out the last few pieces of flooring and E was cleaning up some paintbrushes in the kitchen sink from painting the front door green, a green puddle started to form around the floor drain and plumbing connections. So here are just a few more snapshots of the before

Just to give you an idea of what needed to be removed from the upstairs of the future shop.

Just to give you an idea of what needed to be removed from the upstairs of the future shop.

Bottom floor after a fair amount of cleaning.

Bottom floor after a fair amount of cleaning.

once all the old warped chip board floor was removed
Once all the old warped chip board floor was removed

A leaky floor drain

A leaky floor drain

Where the plumbing came in, along with some very improperly run electrical and natural gas (read dangerous).

Where the plumbing came in, along with some very improperly run electrical and natural gas (read dangerous).

WE’re not slacking

Just in case you were starting to worry that WE are just over here hanging out and not up to anything, or that WE started a project and just gave the whole thing up, never fear WE are still making stuff (and dust, and scrap piles, and piles of yard waste and … etc.). 

The thing is WE’ve been moving out of our apartment and into the house and our employers have made it clear that they still expect us to keep showing up for work, so WE’ve been having to handle those things as well. WE’ve got a few irons in the fire, maybe to many but there are projects going all over the place around the piles of boxes. If you are into doing projects yourself you will understand the predicament this can place you in, a few projects started, new ones being added and never really circling back around to put those finishing touches on things. For instance putting in a door, getting the door painted, getting the trim up, but not getting the trim painted, or the caulking completely finished because it’s never warm enough. Stuff like that. 

WE are also currently making our way down a rabbit hole. One of those starting a project only to find that it cannot be finished until another is done which goes on to reveal that it too cannot be finished until something else is dealt with. It’s like a way less cute version of Russian dolls and you just never know how many they’ve tucked in there. This rabbit hole, which will lead to a series of posts later, has been holding things up but is also what lead to starting all the other little side projects. 

All that to say WE are still making stuff, and when we start finishing stuff WE’ll be posting things. To keep things more organized bigger projects that are all sort of tied together, like say a bathroom remodel, will probably be posted as a series of posts after the project is completed which will make writing them up easier as well as providing continuity. Plus WE really like the before and after stuff. However, Instagram will remain a hot mess of whatever is going on. 

Keep checking back and WE’ll keep making stuff. 

Three day work weekend

So WE did our first few days of non-cleaning-home-owner-projects this past weekend with a three day weekend and the W parents in town to help. Our big focus was to get the house secure and to take advantage of the slightly warmer weather to start tackling some landscaping projects before things got buggy.

So here is what WE accomplished, though it is worth repeating, with quite a bit of assistance:

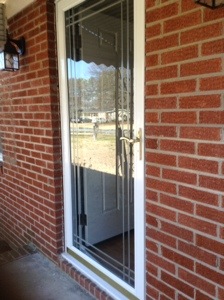
A new front door was installed along with a new storm door.

20140126-093459.jpg

A new door leading out to the patio was installed to replace the original slider that  didn’t really lock, this means that E has the French doors she always dreamed of having in her own home.

IMGP9291_2photo

The flooring in the detached shop was removed to get a start on the floor replacement in there.

IMGP9334unnamed

And some serious yard work was done, the yard was raked for the first time in possibly years, 100’s of feet of Kudzu were removed, all the plant life around the house was pruned back, and those bright blue shutters were removed.

IMGP9287photo-1

Over all a very productive three days.

Thrift Store

As WE mentioned before our house came with some extras and not the normal kind like, “Oh awesome they left the stainless steel appliances!” or, “Sweet the community pool is free!” (Though the trash pick up is free which has been super awesome.)

It is more like “Hey I just bought this retail space that used to be a thrift store and they left all the stuff here.” Actually that’s exactly what it’s like. Our house came with a small thrift store inside. Now thrift stores are awesome and WE get plenty of things from them but, most people don’t walk into a thrift store and say “I’ll take everything.” Generally there are a few items that are good finds and the rest of the stuff you are more than happy to leave there for someone else to pick up.

So WE’re sorting through the stuff and along the way finding some cool stuff to keep, repurpose or sell. Lots of stuff is getting re-bagged and sent to a local thrift store, and some (plenty) is heading to the trash (which is free, see Awesome!)

WE’ll add some photos on here of our best finds and show you the projects that came of things WE repurpose.

Oh and WE are now on Instagram so follow us there to get even more pictures of stuff we are finding @WEMadeStuff

Why this house?

IMGP9283

Every home purchase has a story completely unique to the home and those who made the purchase. But, those stories also all contain similar plot elements, the searching and showings, the pre-qualification, making an offer, some  form of negotiations, various inspections, laying out your life’s work on a mortgage application, a few hurdles along the way and closing. Our story is no different in that sense and so WE’ll skip the story and tell you instead why this particular house and not another.

WE were not looking for a move in ready home. Those are nice, great for some people and supper easy, but unless you had a hand in the process the decorating is all that is really left for personalization. That’s not a bad thing but hanging picture is not really our DIY cup of tea. WE wanted a place with some good bones, a wall or two that needed to come out, at least one floor that needed to be redone, a door or window that needed replacing, a yard that needed a face lift, walls in need of paint, maybe some wood paneling that needed to be removed, moldings that needed to be added, spots in needs of built ins, closets with out a sense of organization, and a few bed rooms thrown into the mix. WE also needed to have a garage that could become a shop – the heart of the operation.

So WE got a house that fit that bill, lots of projects, a bigger yard that needs some help, a great shop space, and some bedrooms. It probably goes without saying that a house like that comes with some projects WE’d rather not do or have to deal with but that’s just part of the deal.

WE expect this to be hard, challenging, difficult and stressful at times. Who knows maybe this is just our strange version of couples therapy and team building.

It is worth noting that it is because WE picked that sort of house that WE have not really been putting up photos of things yet. WE don’t want you to see a dump or a mess because that is not what WE see. The house has been a rental property for years and in that time many tenants have left things there, and the most recent tenants left in a hurry, so there is a lot of cleaning up to do.

Then the projects start and with them the photos.